Tuesday, March 26, 2024

Dead Gods Battle Report - The Eternal vs. Order of Stars

Dead Gods is a rules-lite skirmish tabletop wargame written and designed by Trollish Delver Games (Scott Malthouse). "Rules-lite" in a miniatures game seems like it could be tough to pull off, but Trollish Delver created a simple, elegant system that still has the potential for strategic depth. It's miniatures agnostic, designed for 28mm scale miniatures, so it's also an excuse to use some interesting minis. 

Although the title of this post says this battle was the Eternal vs. Order of Stars, it was really me vs. me, because I played this one as a solo scenario. There are no solo-specific rules for Dead Gods, so I just approached it as a two-player game where I was controlling both sides.

Trollish Delver has been writing games for some time, including publishing RPGs with Osprey, so he knows how to keep a rules set concise and impactful.


Each side is a "Warcult" consisting of models that add up to no more than 30 points. Most of the model options are between 5 and 8 points, so generally you could have 4 or 5 models in your Warcult. One must be the Leader, which is an additional 2 points. Here the Eternal Warcult, I picked a Ghost Warrior (5 points); High Priest (8 points); Golem (7 points); and Skirmisher (7 points). The High Priest was the Leader. I went with Conquest minis for this game because they're recently painted and I like how they look. 

The core rules describe the lore behind four different Warcults, each with their own motivations for collecting relics. 


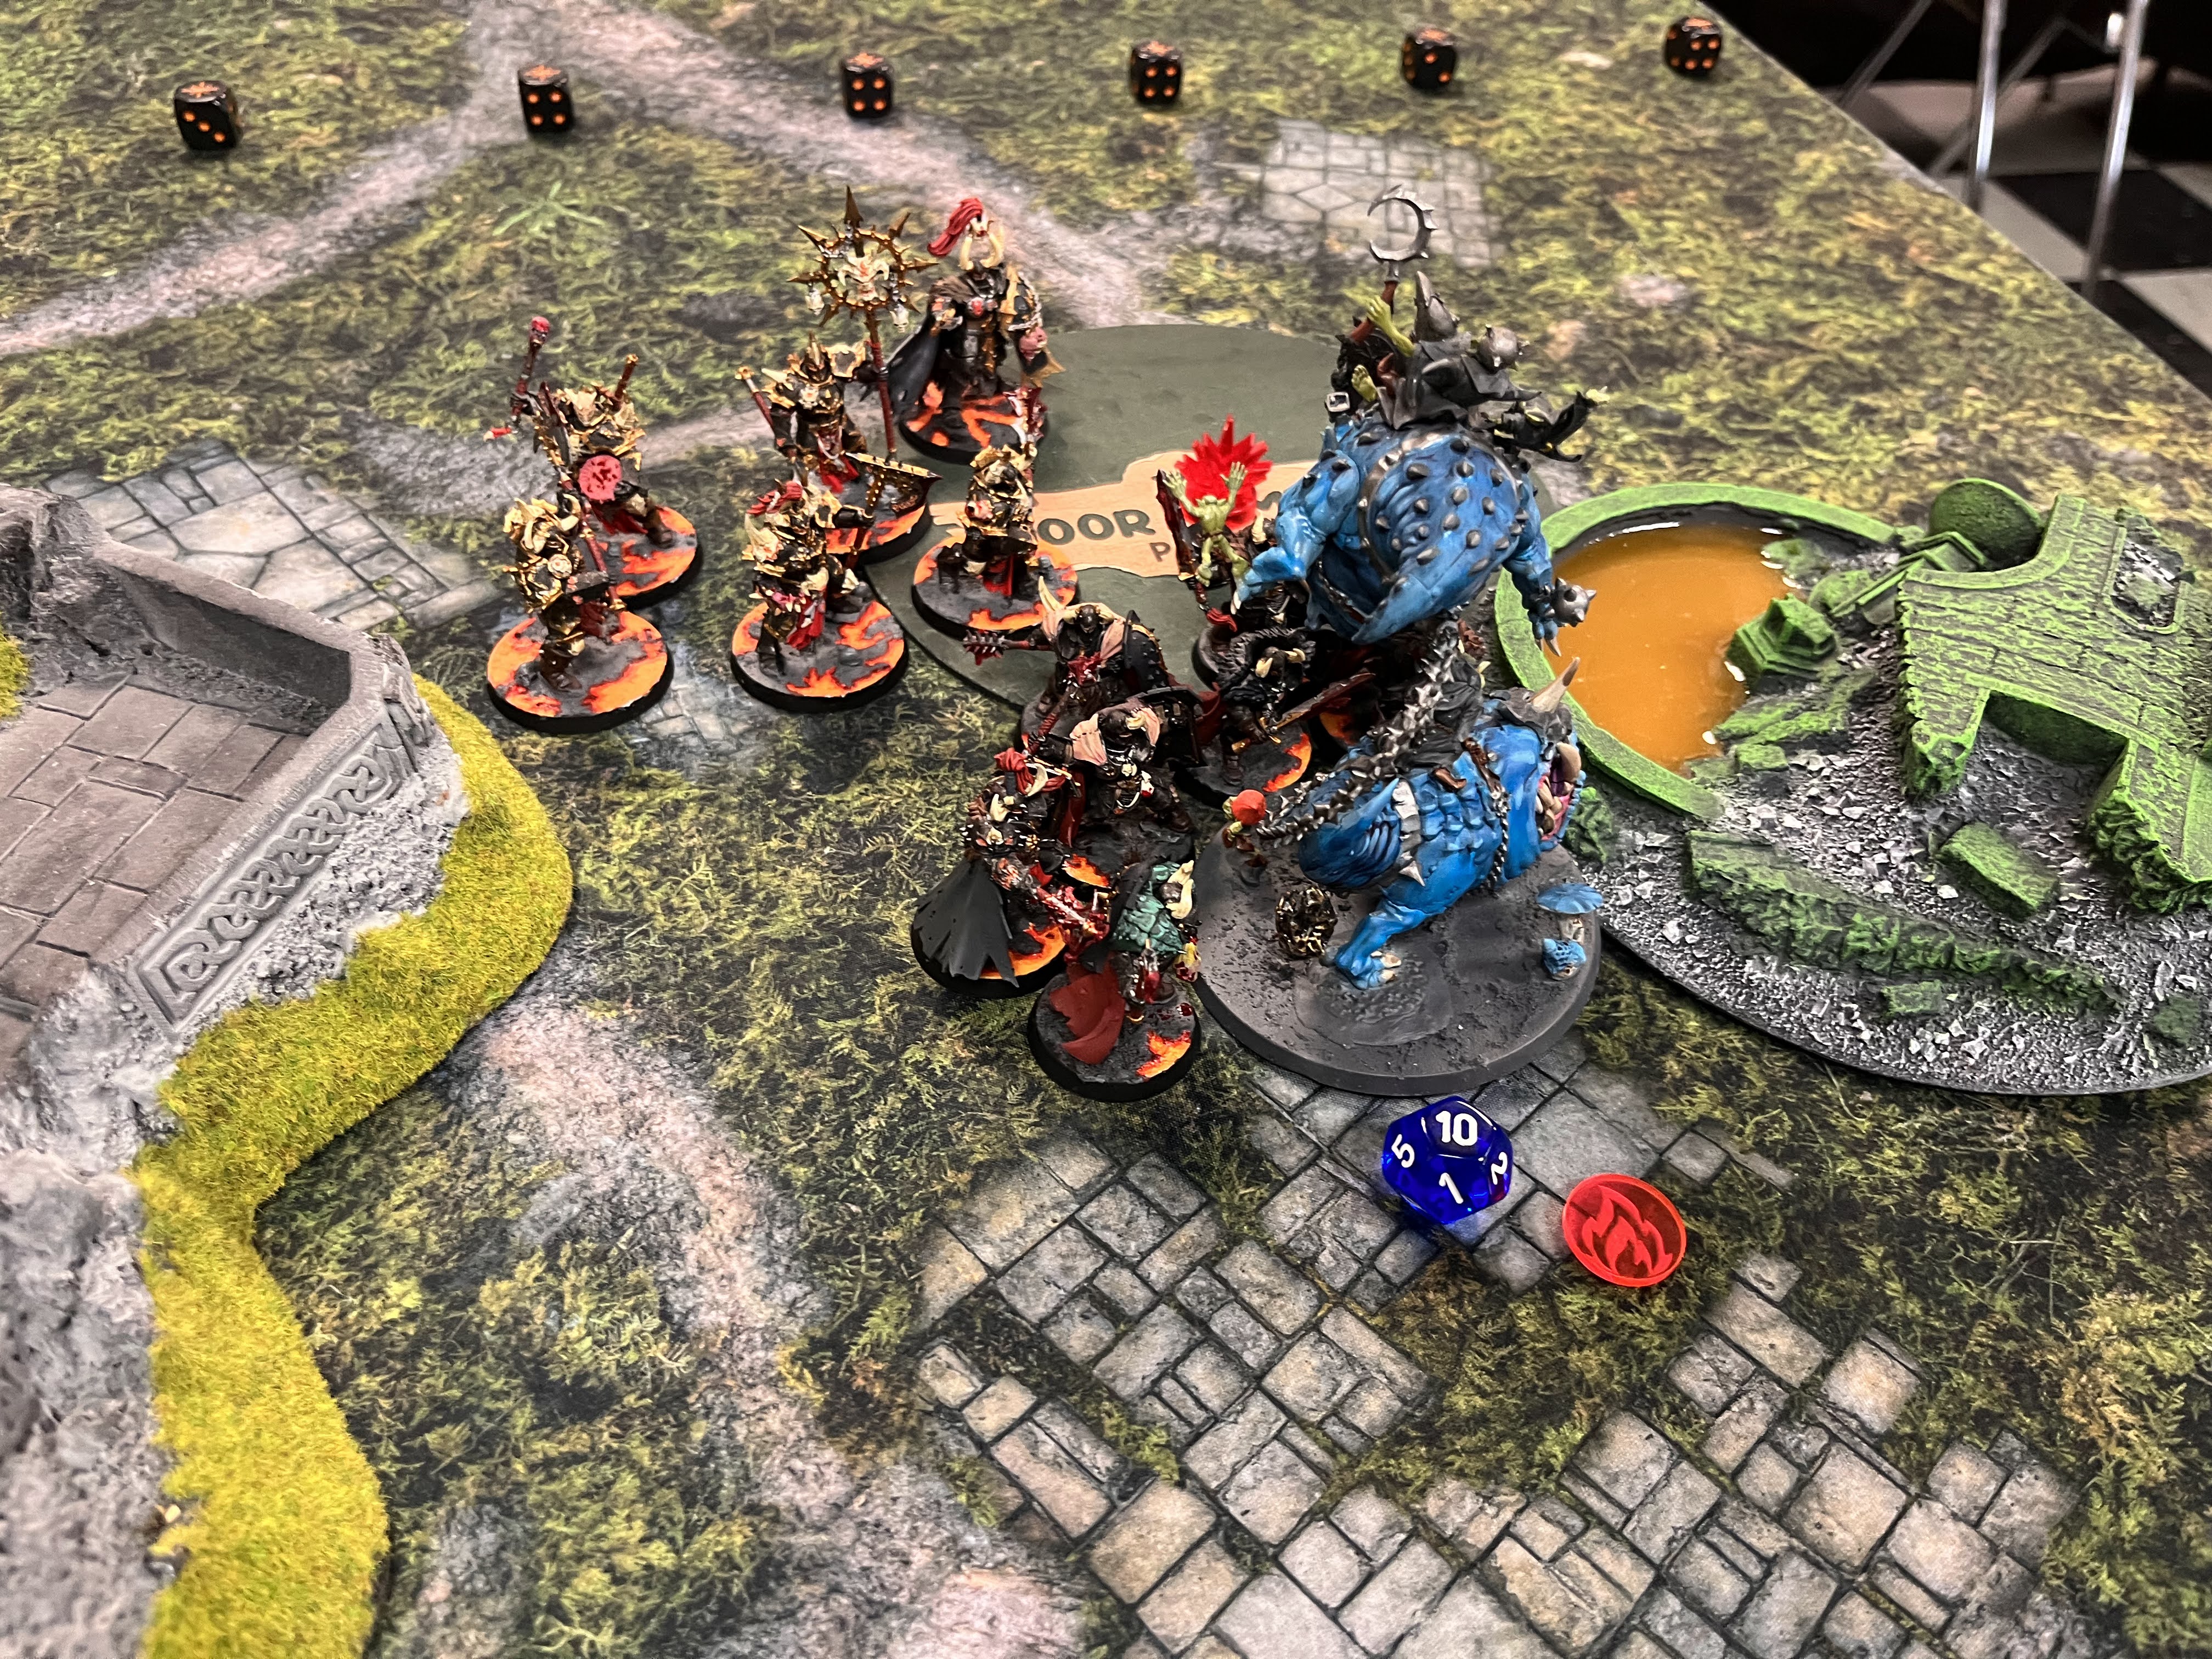
The core rules for Dead Gods describe one basic scenario type, with a 3' x 3' or 2' x 2' table covered in plentiful terrain. The sides deploy no more than 3" from their respective table edges. The opposing Warcult (mostly Idoneth Deepkin minis here) was a Champion (8 points + 2 points for Leader), a Bowmaster (6 points), a Wytch (7 points), and a Knight (7 points). 

The Warcults battle over control of five relics scattered across the board, which they can pick up and return to their edge of the table. The Warcult that collects the most relics (or the last Warcult standing) is victorious. 

Initially, players roll off for initiative. Each model can perform a maximum of two actions during its activation. 2d6 are rolled, and each one under the model's activation stat allows it to take one action. If both dice exceed the activation stat, the model is "Unruly" and gets no actions, while activation switches to the other side. This Unruly mechanic is interesting and helps ensure that the balance of the match can swing back and forth. 


Sure enough, each side seemed poised for victory at points. But inopportune Unruly rolls and some sharpshooting by the Bowmaster kept things interesting. 


A model carrying a relic can only move at half speed, meaning when your opponent is fleeing with a captured relic, you'll almost certainly have a chance to chase them down. The Eternal's Golem spent a majority of this battle following other models around, trying to grab relics. 


Despite the imposing size of the Bone Golem model that I used here, the Golem is actually not an overly impressive combatant (Battle skill 3, must roll equal to or under Battle skill to score a hit in melee). 


Once hit in melee, the other model can make a "saving" roll based on their Defense stat. A model that doesn't save receives a Wound. A Wounded model doesn't immediately fall. Rather, a model can receive multiple Wounds (there are no hit points). When a model makes its next Activation roll, the roll gets a +1 for each Wound marker, and if a Wounded model is Unruly, it is removed from the board. Thus, a Wounded model can still make a last-ditch attempt to continue the fight, but its chances of falling are greatly increased with each Wound.

In the end, the Order of Stars emerged victorious here, securing the most relics and also felling all of the Eternal. I'm definitely interested in trying this game out with friends, but I'd also like to try out some scenarios that are more solo-focused. Trollish Delver mentioned that a solo ruleset could be in the works, but there are some other solo tabletop systems that might mesh well with Dead Gods as well. 


Monday, March 18, 2024

Conquest Battle Report - Old Dominion vs. Old Dominion

Savannah Lion Games held a demo day for Para Bellum's Conquest this past weekend. It was my first in-person experience with the game. Conquest is actually two games in one: Conquest First Blood is a skirmish-style game with warbands, while Conquest Last Argument of Kings is a rank-and-flank game.  

I observed a two-against-two match between two Old Dominion warbands and a team of Nords and Dweghom. 


Then I got a chance to put my own Old Dominion warband on the table - facing off with another Old Dominion force. 


I essentially got tabled, but it was fun getting some of my newly-painted models out on the table. 

My Bone Golem in particular caused some havoc before it went down. The Aura of Death effect deals passive damage to anything in close proximity to the Golem, and here knocked out several Varangian Guard. 

First Blood is a fast-playing, intuitive game, and I really enjoyed my first experience playing it. I'm currently working on painting more Old Dominion stuff to be able to field a full army in the near future. 

Sunday, February 18, 2024

Age of Sigmar Battle Report - Gloomspite vs. Slaves to Darkness

It's been a few years since I got in a game of Warhammer: Age of Sigmar. Although I played quite a bit between 2016 and 2020, COVID stifled the local scene in South Florida. Then, I moved to Georgia. So I finally picked up a copy of the Third Edition Core Rules as well as the most updated Gloomspite Gitz battle tome to re-familiarize myself with the game. 


I diverged from my usual focus on large numbers of grots and squigs, choosing this time to field a list of troggoths, along with some Boingrot Bounderz and Mangler Squigs. My opponent meanwhile utilized a classic Slaves to Darkness list with a mix of Chaos Lord, Chaos Warriors, Chaos Knights, Chaos Chosen, and the Spire Tyrants. 


Though the early game momentum briefly went in the goblins' favor, things quickly took a turn for the worse. The Bounderz darted across the board and landed a quick charge on the Spire Tyrants, eliminating them quickly. After that, the Chaos Knights and Chosen went on a rampage, eliminating the Bounderz, then taking out a unit of troggoths. 


Although the Mangler Squigs survived and did some damage, the buffs on the Chaos Warriors from the hero made them into an extremely effective tar pit. 


In the end, the StD army nearly tabled the grots by round 3. Seeing no mathematical path to victory, I chose to resign. Although the troggoths have the ability to regenerate wounds, and although the Loonshrine can return units to the table, the losses were nonetheless too great to return from. Definitely will take me a few more games to get comfortable and fine-tune the army list. 


Bolt Action Battle Report - Defending Mersa Brega

My dad and I have been working for a while on a Bolt Action campaign set in the Western Desert in Africa. All of the scenarios for the campaign are contained in Warlord's Western Desert campaign book. 

We both bought some kits specifically for the desert campaign. My dad is playing the Germans and I'm playing the British. I got two boxes of British 8th Army infantry as well as several Matilda tanks, a 25-pounder field gun, a Vickers machine gun team, as well as several other pieces that I've been building and painting over time. My dad put together a very cool desert table, complete with stands of palm trees, ruined buildings, and even the El Alamein train station. 

Having finally found some time to get the campaign going, we decided to skip the first five scenarios in the book (Operation Compass) due to their involving mostly Italians on the Axis side. This was the point when Rommel's Afrika Korps had not yet established its presence in the region.

Thus, our first scenario is the assault on Mersa Brega (Operation Sonnenblume). In this scenario, the British are entrenched at Brega but heavily outnumbered by an assaulting German force. 

Per the scenario rules, the majority of British units begin the battle set up within the town, occupying buildings and making use of the dense cover available. 


The rest of the board is essentially wide open, with scattered desert terrain, ruined walls, rocky areas, and fields of razor ribbon. 

The Germans enter the board throughout the first turn, with remaining units held in reserve.

Turn One

Turn one was relatively uneventful, with the British mostly choosing to take Ambush orders while the Germans massed in the desert. 


Turn Two

Turn two saw the battle begin to heat up. The Germans began their advance on Brega, crossing the distance quickly with half tracks and tanks leading the way, while supporting weapons teams took their positions behind. 


The British took advantage of retained Ambush commands, firing in several instances at advancing German units. One of the German infantry units suffered casualties approaching the left side of Brega, and the Vickers machine gun team scored a surprise direct hit on the side armor of the German half track, immobilizing it.  However, the Germans responded in kind and the British machine gun team also suffered a casualty. 


Turn Three

Turn three saw the British Matilda tank attempting to score a hit on the approaching Panzer II but having no luck with the dice. 


Meanwhile, the Germans set their sights on the British sniper team hiding in the front building. Four shots from a medium machine gun, needing 6s to score hits on the protected location:


Four dice, four sixes. Needless to say, the unlucky sniper team was eliminated. Nonetheless, the British responded in kind, neutralizing a pesky German mortar team. 

The game paused at Turn Four, with no clear advantage for either side. Check back for the conclusion of the battle of Mersa Brega in a subsequent post. 

Monday, February 5, 2024

Mythic Americas - Hobby Update

I received the Mythic Americas (Warlords of Erehwon) two-player starter set for my birthday a few years ago - likely in 2021. The box has languished in a closet ever since, but I always have intended to get everything assembled and painted. 

I finally made some progress toward this goal this past weekend. I started with the Sasquatches, which are my favorite models from the entire line. They're the heavy (beast) units for the Tribal Nations faction. I used mainly Citadel contrast paint (Black Templar for the fur with a grey drybrush) and a blue Citadel wash for the skin over a base of white. The club is Army Painter Speedpaint Hardened Leather with a light orange drybrush.


The bases got some texture via Soilworks Winter Ground acrylic paste, which is really nice for simulating gritty, muddy ground. 


Then, to complete the effect, I went with 4Ground Winter Static Grass, which is really easy to apply and looks great. 


After the Sasquatches, I started on the ten Mohawk Warriors, also with the Tribal Nations faction. I went heavy on Citadel Contrast and Army Painter Speedpaints. The results aren't as clean as using traditional acrylics, but the process certainly is faster. All you need is a good base of white primer. 


I used the same base formula as I used for the Sasquatches. I'm happy with the effect and the uniformity, so I'll probably use it for all of the bases for both factions. 


The starter box also has:

  • 10 Seneca Archers (Tribal Nations)
  • 1 Sachem Warlord (Tribal Nations)
  • 20 Tlalocan-bound Dead Warriors (Aztecs)
  • 3 Tlalocan-bound Marauders (Aztecs)
  • 1 Tlalocan High Priest with 4 bodyguards (Aztecs)

We'll see how long it takes me to do the rest. The Aztecs in particular have a lot of repeated sculpts. 

Dead Gods Battle Report - The Eternal vs. Order of Stars

Dead Gods is a rules-lite skirmish tabletop wargame written and designed by Trollish Delver Games (Scott Malthouse). "Rules-lite" ...